Thank you for taking this in consideration.
1 - this calculation has to do with making sure the mean background ADU is enough to swamp the read noise of the camera, such that each subframe can have an exposure length as close as possible to optimal, for your given camera/telescope/sky condition. From various formulas I came across, the swamping factor can be anywhere from 5*RN, 10*RN, 5*RN2, 10*RN2 - where RN is the read noise of the camera, calculated at the ISO / gain you intend to use it at, for your imaging session. 900 ADU was just an arbitrary number that I chose as an example, but it would have to be a value inputted by the user, since every camera has a different read noise and every user is probably going to like a different swamping factor, according to his opinion, theories, studies in the matter, etc.
I image with a D5300, so in my case, my optimal swamping factor would correspond to >800 ADU - this is before BIAS / offset calibration, so it perfectly corresponds to the number given by FIT Viewer, when it loads the picture that you just took with the Capture tool.
My workflow goes usually like this: I take some test exposures starting with an exposure time I typically know gives me >800 ADU, read the mean given by FIT Viewer, adjust the exposure as necessary and start a sequence of say 10-20 images. I am by my rig - so no automation, yet - and I keep watching the images in FIT Viewer, my guiding graph, etc. Sometimes I notice, as the object rises in darker parts of the sky, that the mean ADU falls below my optimal one, since the sky is darker. Therefore I stop the sequence, adjust exposure, and start another 10-20 images. I adjust as necessary until I am ready to call it a night. For the sake of future automations, it would be nice if the Capture / Sequencing tools could check the mean ADU inputted by the users as the chosen optimal one, compare it to the one in FIT Viewer and adjust exposure if it falls out of a tolerance of say +/- 50 ADU from the given one. To make things easier, only round number of seconds should be used (example, increments of 5 - 10 seconds). Also, I don't take darks, as I use a DSLR and I don't have control over the temperature. I also notice that calibrating with master bias is good enough. I am sure people that use darks and have dark libraries, won't probably benefit or even use this feature, since they would have to make suitable darks for each group of subexposures within a given session and calibrate them accordingly. So, I understand if this feature won't be implemented.
2 - this however I would really love to have. I know right know KStars displays at least two field of views on the sky map: the solver field of view and the field of view centered around the cross-hair as you move the mouse around to check for other targets. But it would really be nice if it overlayed the first field of view from Load and Slew and keep it there as a reference - without overwriting it with the following solver one. Then as the images coming from the camera are solved, as the mount keeps moving and getting closer within tolerance to the RA/DEC coordinates of the Load and Slew picture, I could also see how far off the parallelism between the new field of view of the camera (given by the current, most likely wrong rotation) and the old field of view from the previous session is. Once I get the rotation close enough (by keeping hitting Sync on Astrometry, and have it display new field of views as I rotate the camera), the user could turn off the original field of view to remove clutter on the screen. A fantastic bonus would be if the program would calculate by how many degrees the new rotation is off from the original one. In this way the user would have a number to judge how good the new rotation is, instead of just trusting his eyes with the parallelism of the sensor edges.
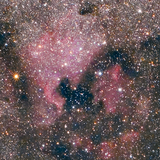
Thanks again, and I will understand if the first one won't be implemented, but I would really, really appreciate the second one. I change camera rotation often and it's almost impossible to get it right within sessions. For example, a few nights ago I tried capturing more data on the Heart Nebula, and I thought the new rotation was close enough to the old one, but once I checked the images on the computer they were quite off (4-5°) and it will mean having to crop the edges where the images don't completely overlap. If the target is small and there's a lot of unneeded black sky around it, it's not a problem, but if the nebula is quite wide, a few degrees can mean cropping the object itself.
Thanks for all the hard work on this suite, I absolutely love it so far!
Matteo
×
INDI Library v2.0.7 is Released (01 Apr 2024)
Bi-monthly release with minor bug fixes and improvements
Autoexposure and Fixed Rotation of Load and Slew Image
- Matteo Gaetan
-
 Topic Author
- Offline
- Junior Member
-

- Posts: 27
- Thank you received: 4
Hello,
as I was deep into my imaging session last night, I thought of two things that could be useful - to me, and hopefully to others - if they were implemented:
1) - autoexposure setting in the Capture tool. Why? Because as the objects rise into darker areas of the sky, the mean/median ADU values get lower if exposure stays the same. Since my goal is to swamp read noise and my optimal ADU target for my camera is - say - 900 ADU, I would like a feature in which you could specify this target ADU (for un-debayered images) and a +/- tolerance. Then you specify an exposure that gives the wanted ADU at the current object position. For example, last night I started with 180s, but ended up having to raise it to 240s later on to stay on my 900 ADU target. The feature should analyze the ADU of each captured image, compare it to the target and if within tolerance, do nothing (keep taking exposures at the given starting exposure setting). Once the ADU is out of tolerance, the feature should take a longer (or shorter, depending if ADU went higher or lower than target + or - tolerance) until ADU is still equal to target and within tolerance. Then continue taking exposures and repeat as necessary until session ends
2) - when I loaded an image from a previous session into Astrometry and used the Load and Slew feature, the mount pointed the scope perfectly at the same center RA/DEC coordinates (within specified tolerance). Unfortunately, it didn't keep the rotation of the field of view in KStars from the first image I loaded, but overwrote it with the image field of view as taken by the current camera rotation. I had a really hard time judging by how much to rotate the camera to match the field of view of my previous session as best as I could. I kept loading the first image using Load and Slew, just to see for a few seconds the "wanted" camera orientation and compare it to the current camera orientation plus adjustment to see how close I was. However the "wanted" camera orientation only lasts a split second and then immediately gets replaced by the new orientation, so I ended up being off by a few degrees. It's not a problem, since the final image can be trimmed, but I would really appreciate if it was possible to keep the initial solved field of view from Load and Slew in KStars so that I could compare it to the following plate solves as I rotate the camera to try to match it as close as possible. I am sure that in this way the field of view of the following sessions would be a lot closer to the original one, if I could have the original field of view overlaid in KStars while doing the rotations
Sure, the camera shouldn't be moved/rotated, if I plan to do multiple sessions on the same target, in different nights, but sometime it is necessary to rotate it, for example if I plan to capture more than one target in a given night and the various targets benefit from different camera rotations. Unfortunately I don't have a graduated scale on my camera rotator, so I couldn't write down the degrees of rotation even if I wanted to.
Thanks for reading and - hopefully - considering these features!
Matteo
The following user(s) said Thank You: Jasem Mutlaq
3 years 6 months ago
#61585
Please Log in or Create an account to join the conversation.
- Jasem Mutlaq
-
- Offline
- Administrator
-

Replied by Jasem Mutlaq on topic Autoexposure and Fixed Rotation of Load and Slew Image
Thank you for the valuable feedback.
1. Is this how optimal exposure duration algorithm supposed to work? by measuring mean ADU in the image? Why 900?
2. Noted, we'll see how to accommodate this without making the GUI even more confusing and cluttered.
1. Is this how optimal exposure duration algorithm supposed to work? by measuring mean ADU in the image? Why 900?
2. Noted, we'll see how to accommodate this without making the GUI even more confusing and cluttered.
3 years 6 months ago
#61675
Please Log in or Create an account to join the conversation.
- Matteo Gaetan
-
Topic Author
- Offline
- Junior Member
-
- Posts: 27
- Thank you received: 4
Replied by Matteo Gaetan on topic Autoexposure and Fixed Rotation of Load and Slew Image
Thank you for taking this in consideration.
1 - this calculation has to do with making sure the mean background ADU is enough to swamp the read noise of the camera, such that each subframe can have an exposure length as close as possible to optimal, for your given camera/telescope/sky condition. From various formulas I came across, the swamping factor can be anywhere from 5*RN, 10*RN, 5*RN2, 10*RN2 - where RN is the read noise of the camera, calculated at the ISO / gain you intend to use it at, for your imaging session. 900 ADU was just an arbitrary number that I chose as an example, but it would have to be a value inputted by the user, since every camera has a different read noise and every user is probably going to like a different swamping factor, according to his opinion, theories, studies in the matter, etc.
I image with a D5300, so in my case, my optimal swamping factor would correspond to >800 ADU - this is before BIAS / offset calibration, so it perfectly corresponds to the number given by FIT Viewer, when it loads the picture that you just took with the Capture tool.
My workflow goes usually like this: I take some test exposures starting with an exposure time I typically know gives me >800 ADU, read the mean given by FIT Viewer, adjust the exposure as necessary and start a sequence of say 10-20 images. I am by my rig - so no automation, yet - and I keep watching the images in FIT Viewer, my guiding graph, etc. Sometimes I notice, as the object rises in darker parts of the sky, that the mean ADU falls below my optimal one, since the sky is darker. Therefore I stop the sequence, adjust exposure, and start another 10-20 images. I adjust as necessary until I am ready to call it a night. For the sake of future automations, it would be nice if the Capture / Sequencing tools could check the mean ADU inputted by the users as the chosen optimal one, compare it to the one in FIT Viewer and adjust exposure if it falls out of a tolerance of say +/- 50 ADU from the given one. To make things easier, only round number of seconds should be used (example, increments of 5 - 10 seconds). Also, I don't take darks, as I use a DSLR and I don't have control over the temperature. I also notice that calibrating with master bias is good enough. I am sure people that use darks and have dark libraries, won't probably benefit or even use this feature, since they would have to make suitable darks for each group of subexposures within a given session and calibrate them accordingly. So, I understand if this feature won't be implemented.
2 - this however I would really love to have. I know right know KStars displays at least two field of views on the sky map: the solver field of view and the field of view centered around the cross-hair as you move the mouse around to check for other targets. But it would really be nice if it overlayed the first field of view from Load and Slew and keep it there as a reference - without overwriting it with the following solver one. Then as the images coming from the camera are solved, as the mount keeps moving and getting closer within tolerance to the RA/DEC coordinates of the Load and Slew picture, I could also see how far off the parallelism between the new field of view of the camera (given by the current, most likely wrong rotation) and the old field of view from the previous session is. Once I get the rotation close enough (by keeping hitting Sync on Astrometry, and have it display new field of views as I rotate the camera), the user could turn off the original field of view to remove clutter on the screen. A fantastic bonus would be if the program would calculate by how many degrees the new rotation is off from the original one. In this way the user would have a number to judge how good the new rotation is, instead of just trusting his eyes with the parallelism of the sensor edges.
Thanks again, and I will understand if the first one won't be implemented, but I would really, really appreciate the second one. I change camera rotation often and it's almost impossible to get it right within sessions. For example, a few nights ago I tried capturing more data on the Heart Nebula, and I thought the new rotation was close enough to the old one, but once I checked the images on the computer they were quite off (4-5°) and it will mean having to crop the edges where the images don't completely overlap. If the target is small and there's a lot of unneeded black sky around it, it's not a problem, but if the nebula is quite wide, a few degrees can mean cropping the object itself.
Thanks for all the hard work on this suite, I absolutely love it so far!
Matteo
Please Log in or Create an account to join the conversation.
- Matteo Gaetan
-
Topic Author
- Offline
- Junior Member
-
- Posts: 27
- Thank you received: 4
Replied by Matteo Gaetan on topic Autoexposure and Fixed Rotation of Load and Slew Image
It appears I found a workaround to solve my issue #2:
1) - Load the image from the previous session in Load & Slew
2) - Take note of the angle of rotation computed by the solver when it solves the image, before it solves the following one coming from the camera's new, most likely wrong, rotation (see picture)

3) - Go in KStars and edit the custom field of view corresponding to the imaging telescope / camera combination being used
4) - Input the same angle of rotation given by the solver in step 2) (see picture)

5) - Enjoy the custom field of view with the correct rotation, overlaid in KStars (even if it's flipped by 180°, but it doesn't really matter) (see picture)

The yellow one is from the solver, the orange one is the CCD simulator with the same angle as the solver (these two will change as soon as the new image coming from the camera is solved). The red one is the custom field of view with the correct rotation (this one will stay until unchecked in Settings, FOV Symbols).
6) - Keep solving images as the camera is rotated, until the Solver FOV match the custom one; also, check for angle of rotation given by the solver, until happy that it is close enough to the initial value
There you have it, visual and number confirmation on how good the camera rotation is compared to the one from the previous session.
1) - Load the image from the previous session in Load & Slew
2) - Take note of the angle of rotation computed by the solver when it solves the image, before it solves the following one coming from the camera's new, most likely wrong, rotation (see picture)
3) - Go in KStars and edit the custom field of view corresponding to the imaging telescope / camera combination being used
4) - Input the same angle of rotation given by the solver in step 2) (see picture)
5) - Enjoy the custom field of view with the correct rotation, overlaid in KStars (even if it's flipped by 180°, but it doesn't really matter) (see picture)
The yellow one is from the solver, the orange one is the CCD simulator with the same angle as the solver (these two will change as soon as the new image coming from the camera is solved). The red one is the custom field of view with the correct rotation (this one will stay until unchecked in Settings, FOV Symbols).
6) - Keep solving images as the camera is rotated, until the Solver FOV match the custom one; also, check for angle of rotation given by the solver, until happy that it is close enough to the initial value
There you have it, visual and number confirmation on how good the camera rotation is compared to the one from the previous session.
3 years 6 months ago
#61846
Please Log in or Create an account to join the conversation.
Time to create page: 0.218 seconds
© 2003-2022 by INDI Library. All rights reserved.